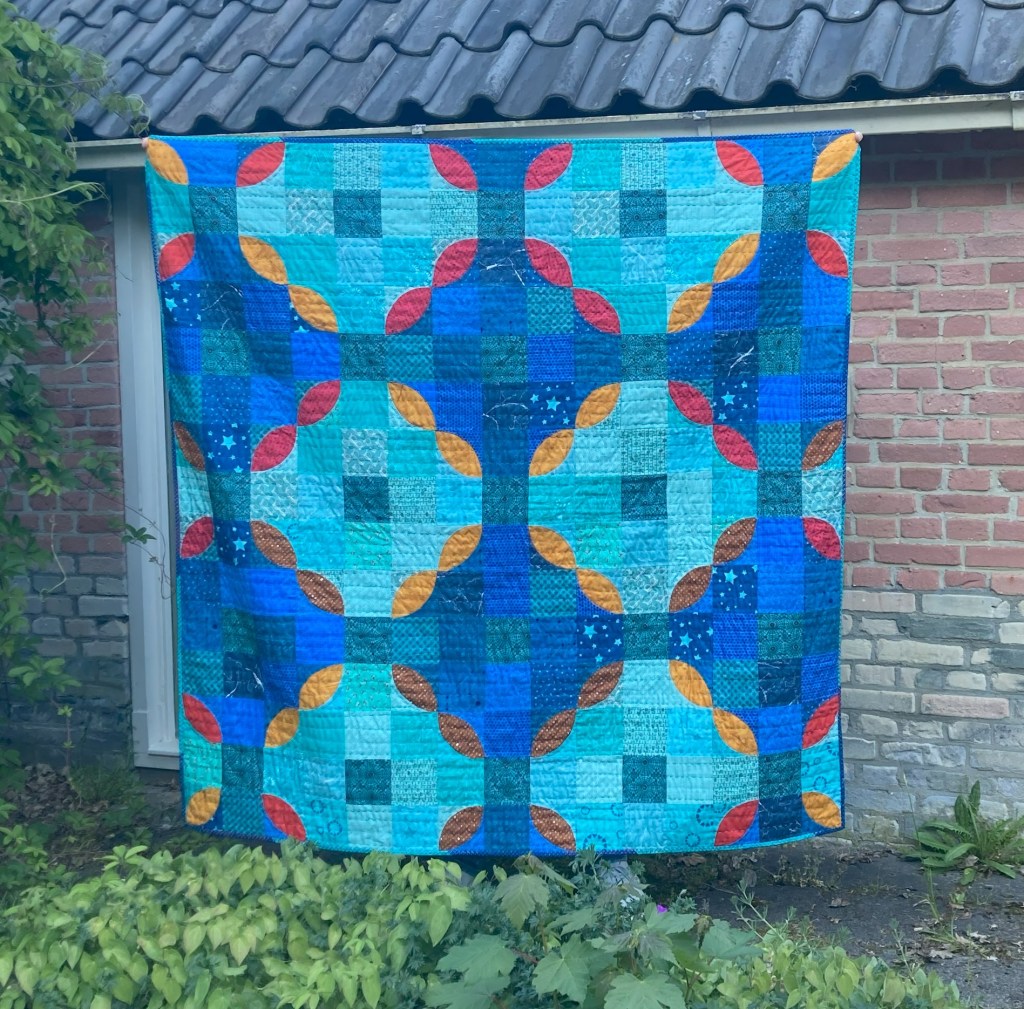
On April 18, the MQG Sew-A-Long 2024 began, organized by The Modern Quilt Guild in the United States. During this sew-a-long, we’re making the Satsuma Quilt, designed by Holly Clarke, a member of Winnipeg MQG. You can find her online as Hold My Seamripper. The quilt is based on the traditional Irish Chain, but Holly gave it a modern twist by replacing many of the squares with orange peel blocks. The name Satsuma playfully refers to the citrus shape of these curved blocks.

The Sew-A-Long Schedule
The sew-a-long lasted eight weeks, with the following structure:
- Week 1-2: Choosing, cutting, and labeling fabric
- Week 3-4: Preparing and pinning the orange peel blocks
- Week 5: Assembling the orange peel blocks
- Week 6: Sewing the 9-patch blocks
- Week 7-8: Assembling the quilt top

Fabric Choices: A Scrappy Experiment
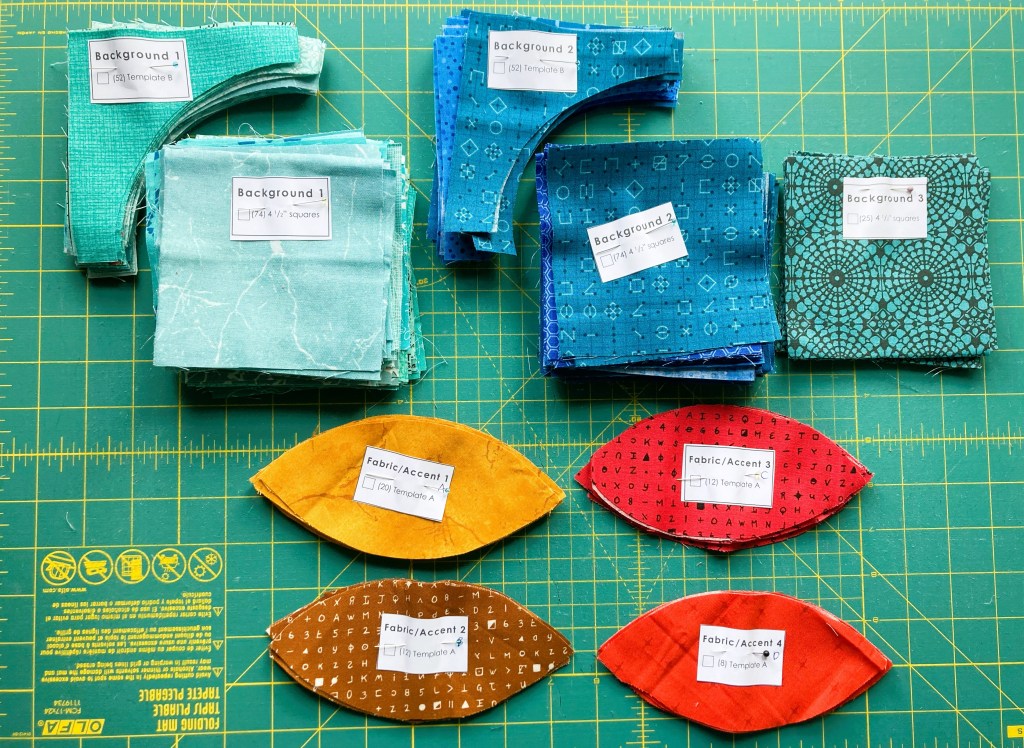
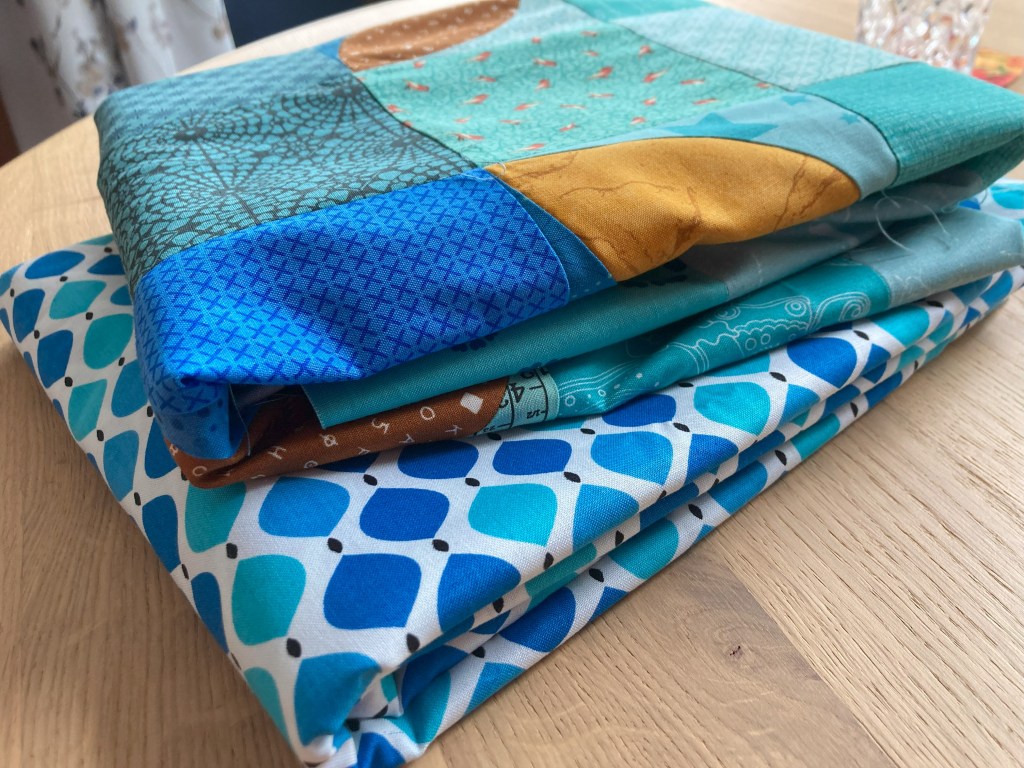
Instead of using the solid fabrics from the original pattern, I decided to make this quilt using a mix of blenders and basics from my stash. For the background I chose:
- Turquoise/green fat quarters
- Blue fat quarters in matching tones
- A single dark blue fabric (less of this was needed)
For the orange peels, I went with contrasting shades in orange, red, and brown. I played with light-dark contrast to try to maintain the graphic effect of the original quilt.
I cut, labeled, and organized everything — something I don’t always do so precisely, but for this pattern, it truly made a difference. The placement of fabrics is key to achieving the final visual effect.


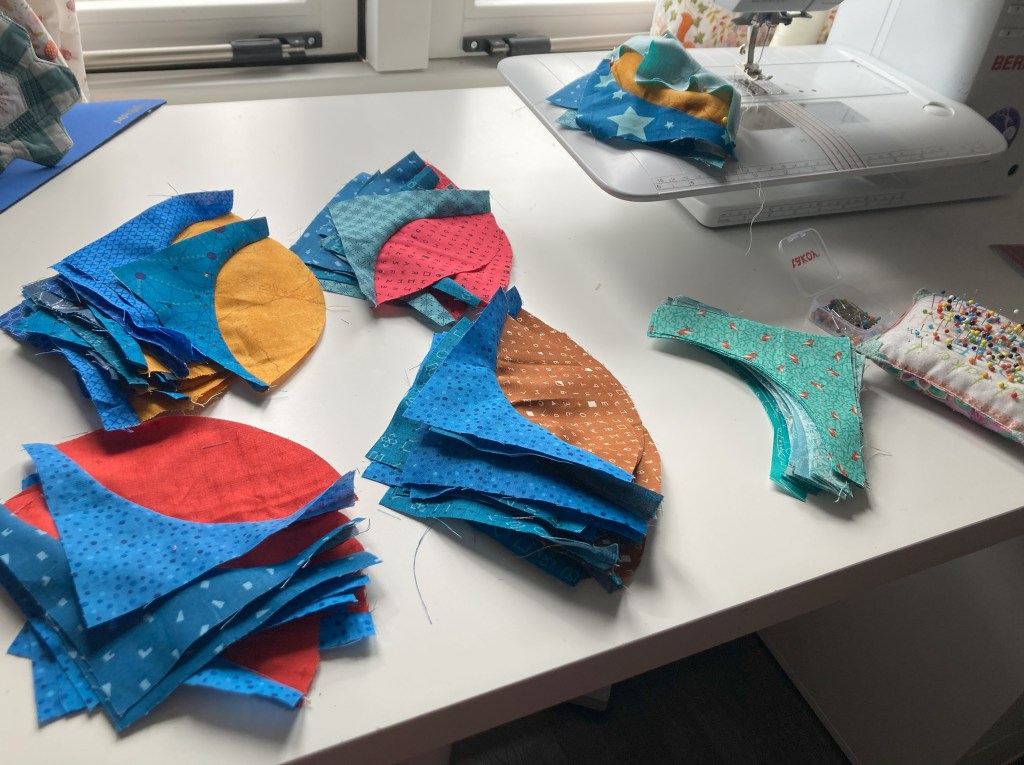
Making the Orange Peels
After cutting, I started pinning the orange peel blocks. Each one gets a dark blue background piece on one side and a turquoise/green one on the other. Since the blocks can be rotated, the exact placement wasn’t important at this stage.
The MQG video did a great job explaining how to pin curves — laying the fabric flat. I enjoy working with pins: I start with the tips, then the middle. I fold each piece gently in half (right sides together for one, wrong sides together for the other) to create center creases that match up perfectly. Just like with nesting seams, the fabric naturally falls into place.
After sewing, it was time to trim the blocks. MQG recommended trimming after each side is sewn, but I preferred to sew both background pieces first and then trim — this gave me more flexibility for adjustments.


Assembling the Blocks
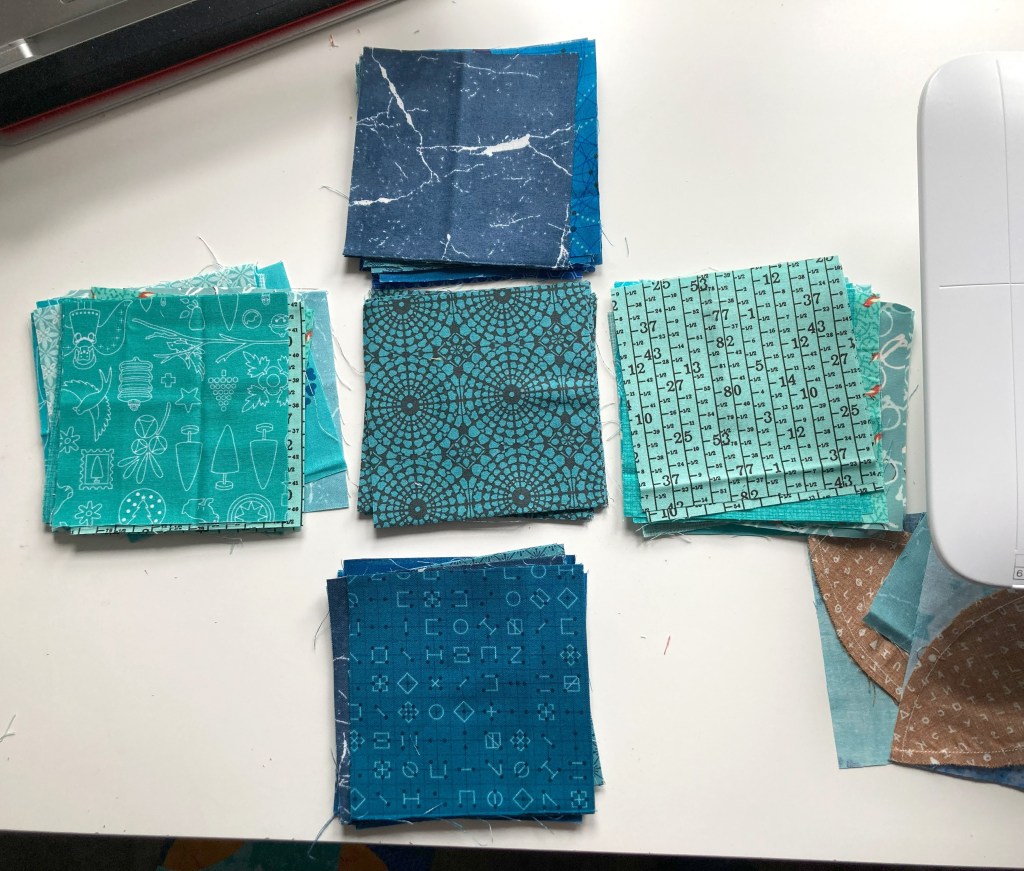
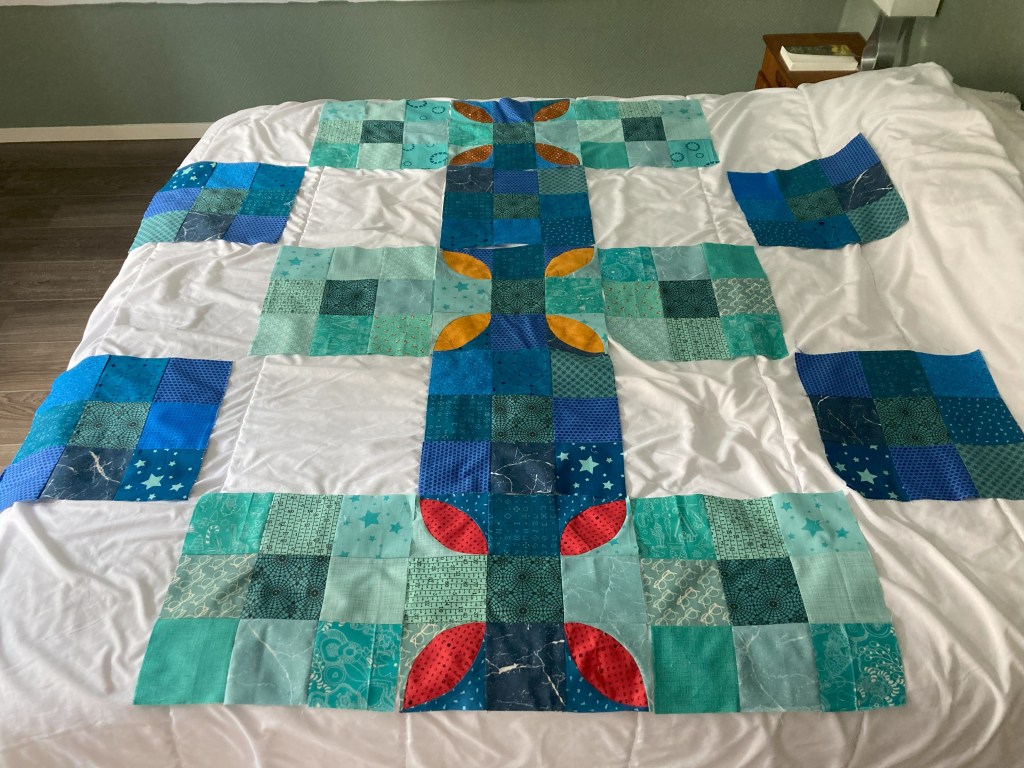
Next came arranging the orange peel blocks. Since the background and peel fabrics varied so much, almost no two blocks were the same. To keep track, I laid out the background fabrics and matched each one with the right orange peels — quite the puzzle, but worth the effort.
Week 6 was the easiest in terms of sewing: making the 9-patch blocks with one dark blue center and matching background fabrics around it. A nice breather after the precision work of week 5.


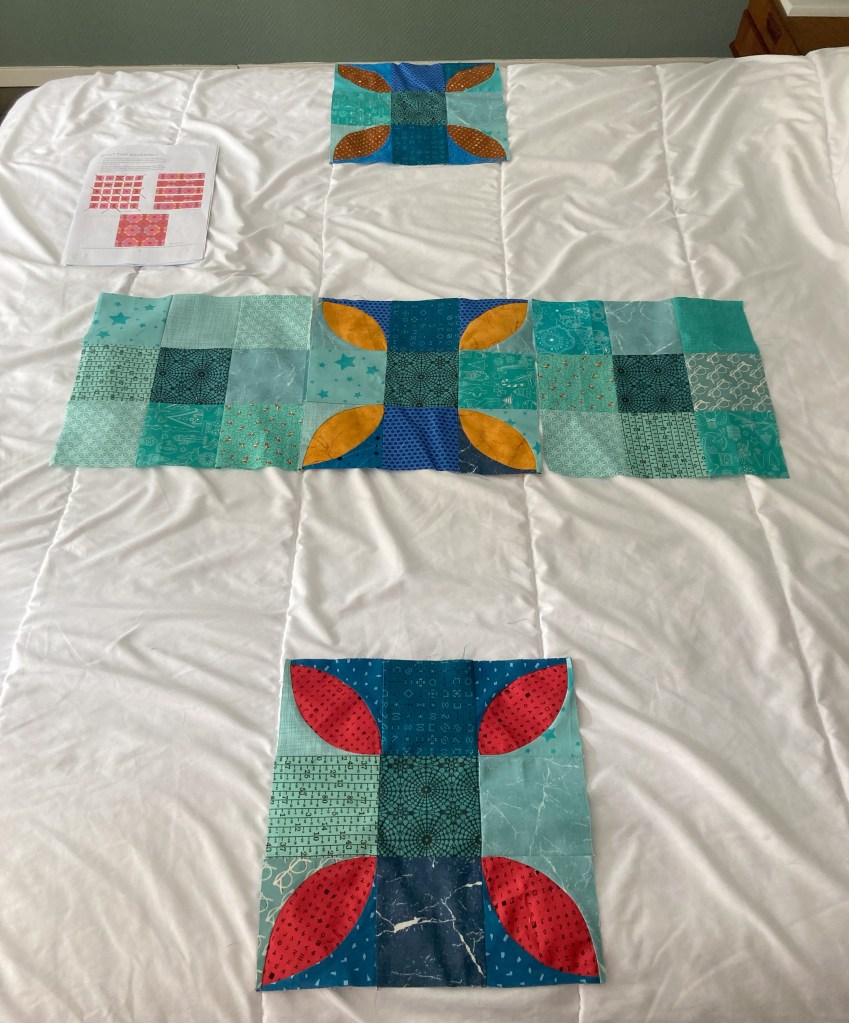
Piecing the Quilt Top
Weeks 7 and 8 were all about assembling the top — a real puzzle once again. Only after the top is sewn can you truly see the full effect of the pattern. I laid everything out on my bed, checked each block against the layout, and had my partner help double-check the alignment of the lines.
Then I rotated some blocks to avoid having the same fabrics next to each other. During sewing, some pieces still shifted slightly — but that’s part of the charm of a scrappy quilt. To avoid this completely, you’d need much more planning, and that didn’t fit the spirit of this experiment.

Hand Quilting: From Frustration to Flow
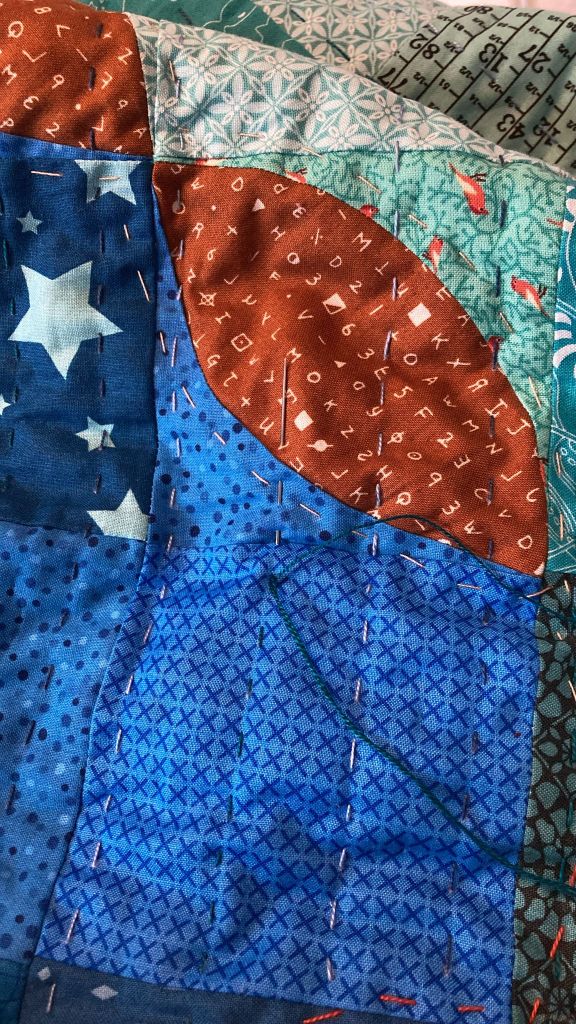
From the beginning, I knew I wanted to hand quilt this piece. An experiment within an experiment. I’d done some big-stitching on smaller projects before, but never on a quilt this size.
To make it easier, I had the quilt basted on a longarm by Mique (highly recommend!). I started quilting with enthusiasm, but the pattern I chose turned out to be too complicated, and I lost motivation. After attending a Jen Kingwell workshop, I felt inspired again — and suddenly, I finished quilting the whole thing in two weeks.
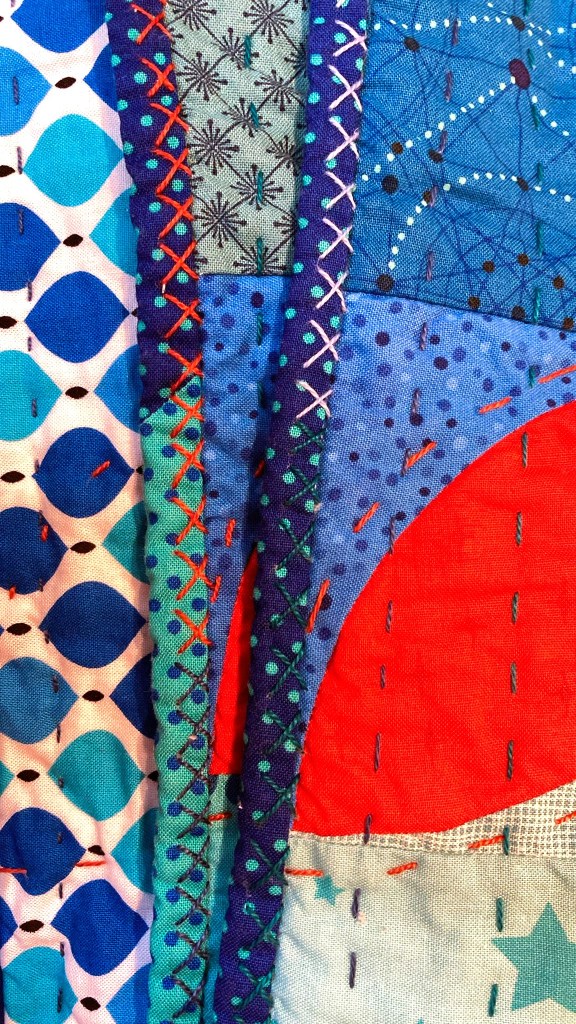
I also used big-stitching for the binding, adding little crosses as a decorative finish. It was a lot of work, but perfect for doing while watching the Eurovision Song Contest — a full week of couch quilting and “interesting” TV.
For quilting and binding, I used Scheepjes Candy Floss thread — lovely to work with, beautiful colors, and enough on one spool to finish an entire quilt.
A Successful Experiment
On a sunny day in my parents’ garden, I finally photographed the finished quilt. The light added beautiful depth and color. I’m genuinely happy with the result.
This is what I said last year:
“As an experiment, I’m going to make this quilt using a wide variety of fat quarters from my stash.”
And I’m so glad I did. It shows that even with prints and a mix of colors, you can still create the same visual impact as solids — see below on the photos. Left is the original by Holly, on the right is my version.
What do you think? Does the scrappy effect work? How do you approach block placement — do you plan everything or let it go? Let me know in the comments!


Leave a comment